The January 2011 Daring Bakers’ challenge was hosted by Astheroshe of the blog accro. She chose to challenge everyone to make a Biscuit Joconde Imprime to wrap around an Entremets dessert.
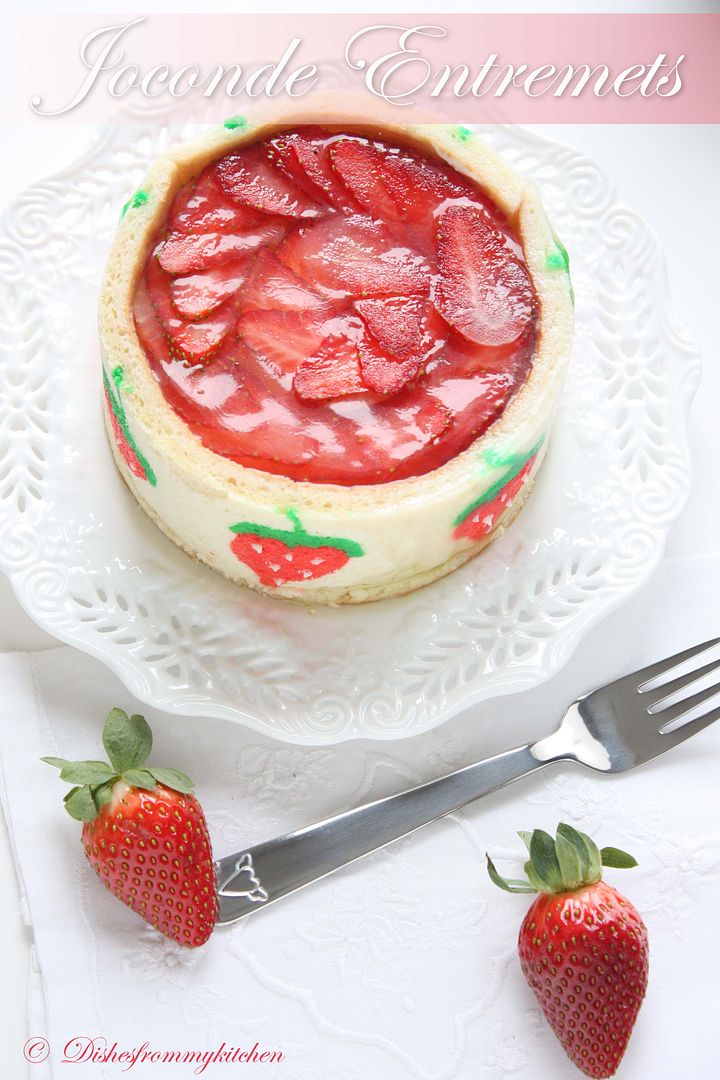
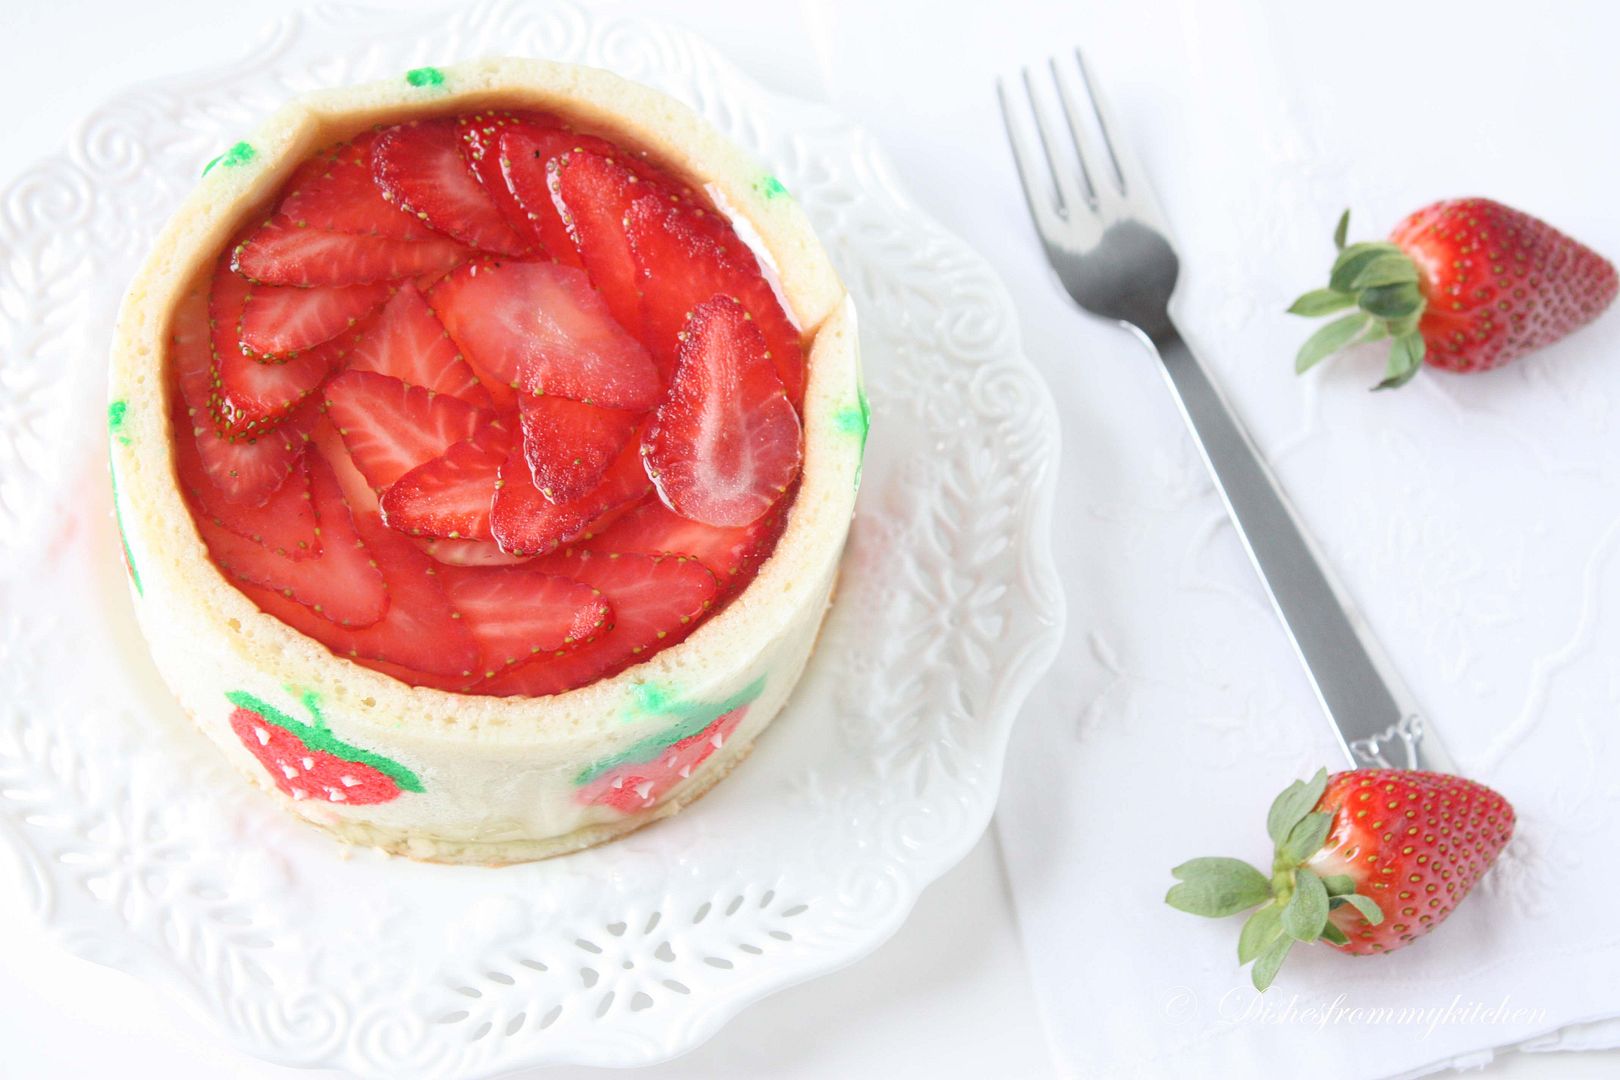
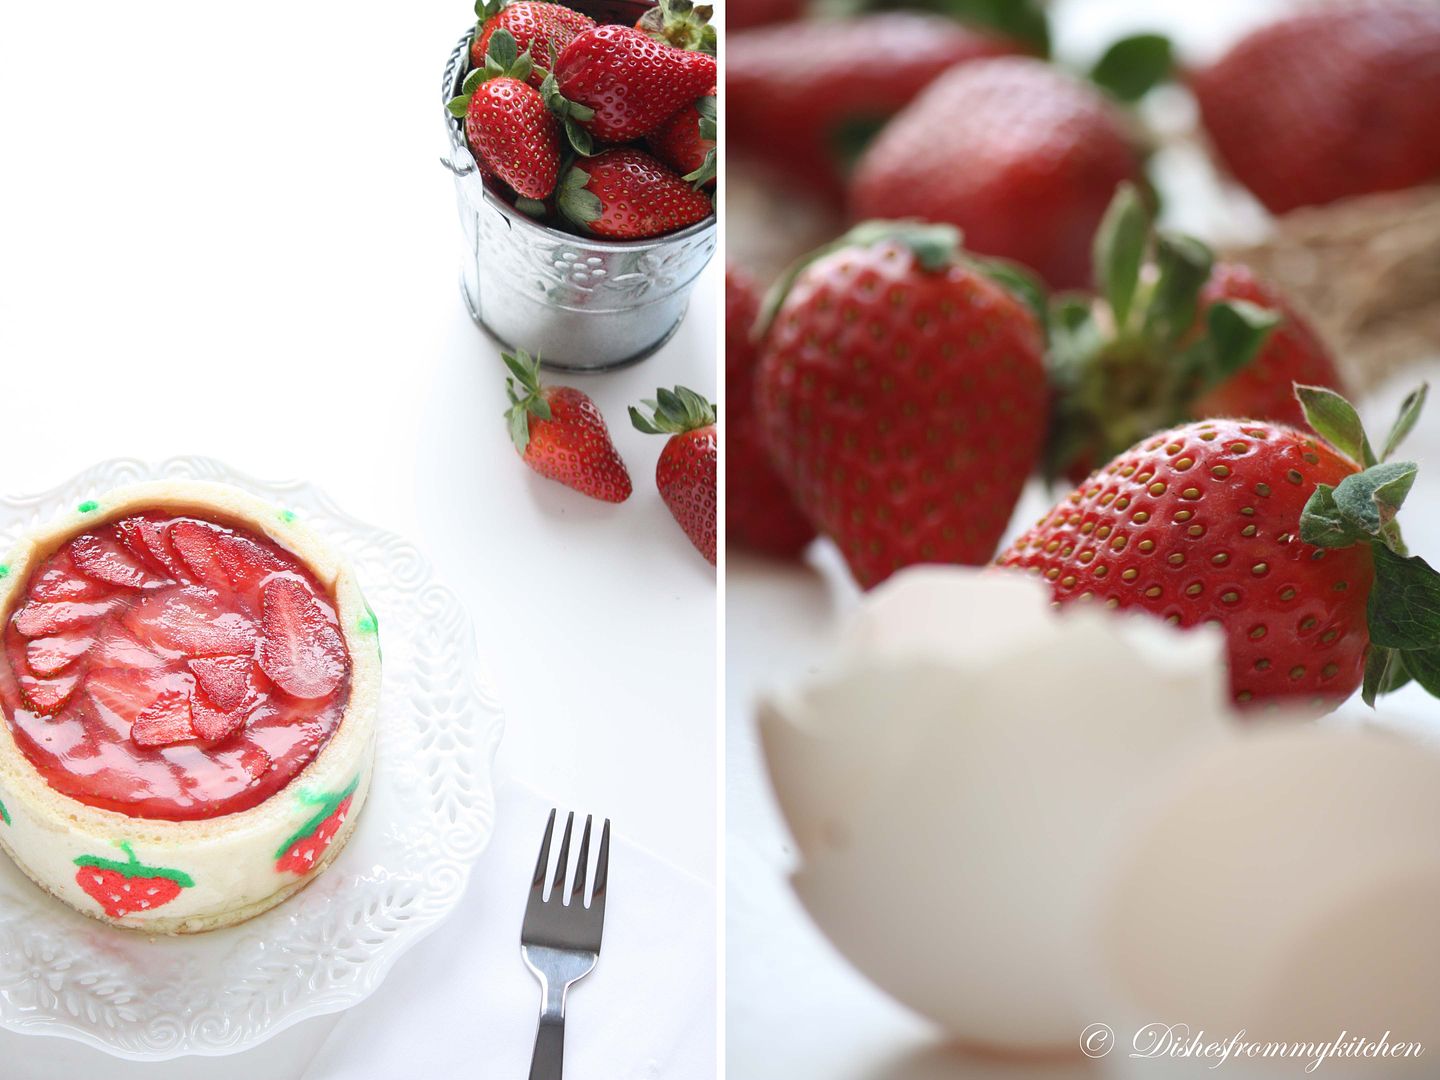
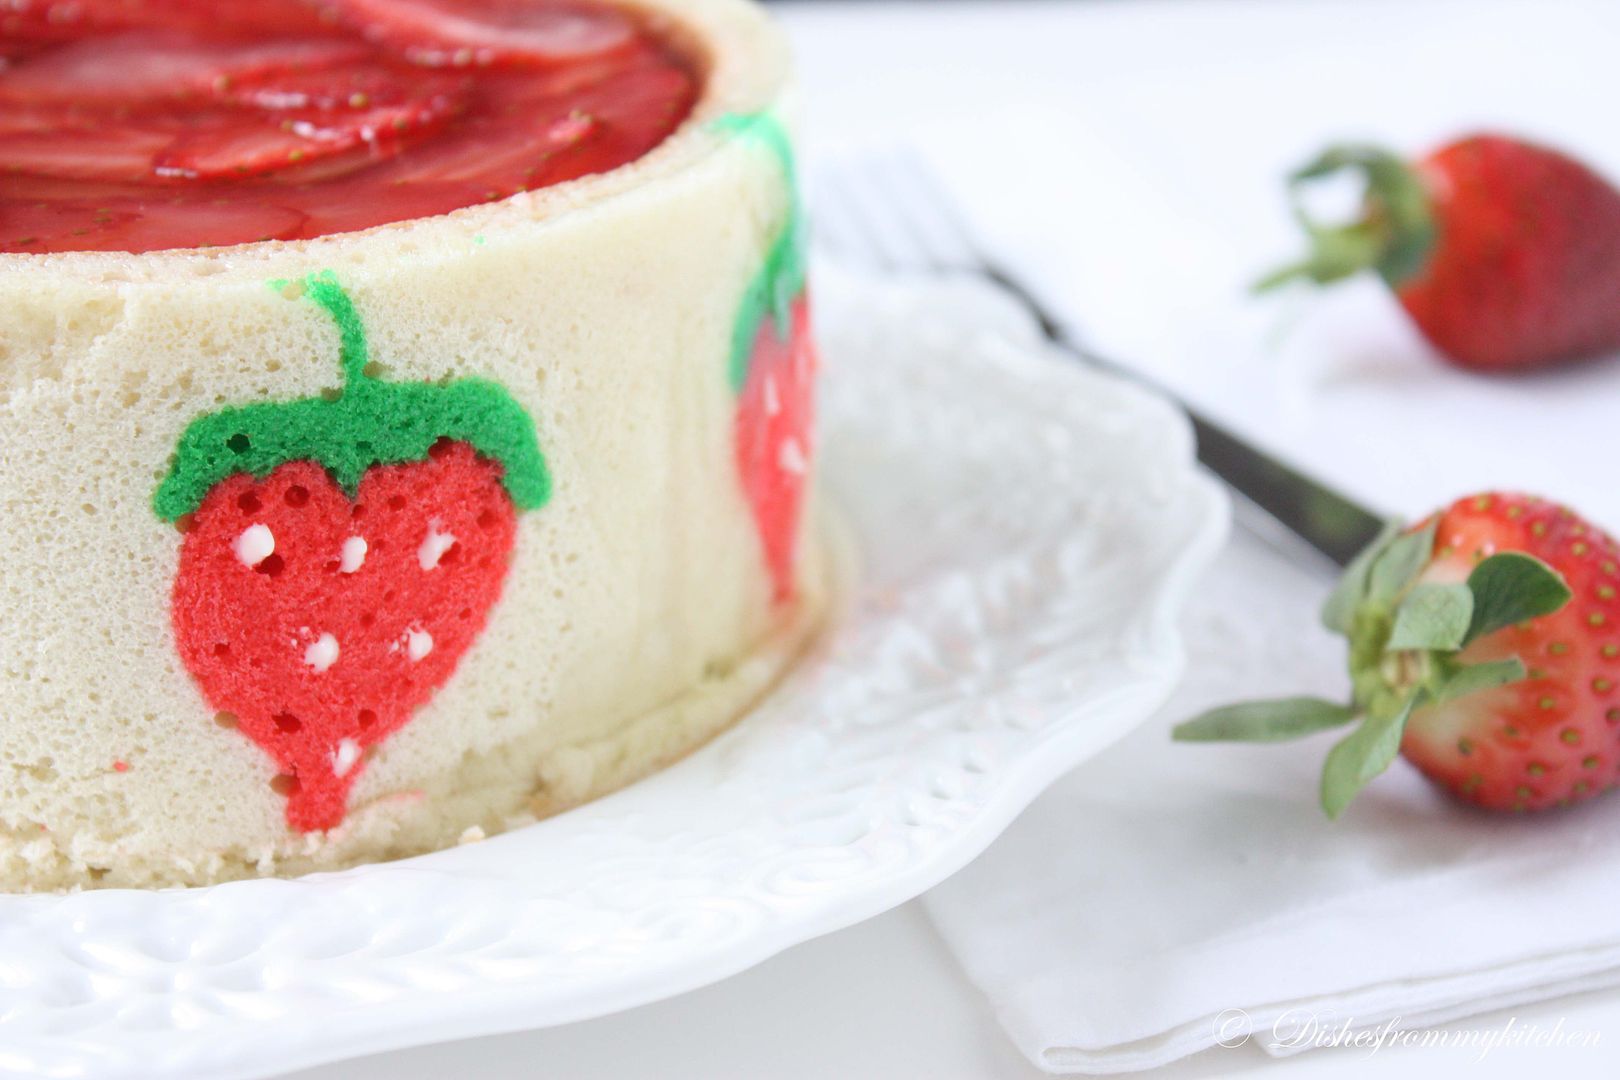
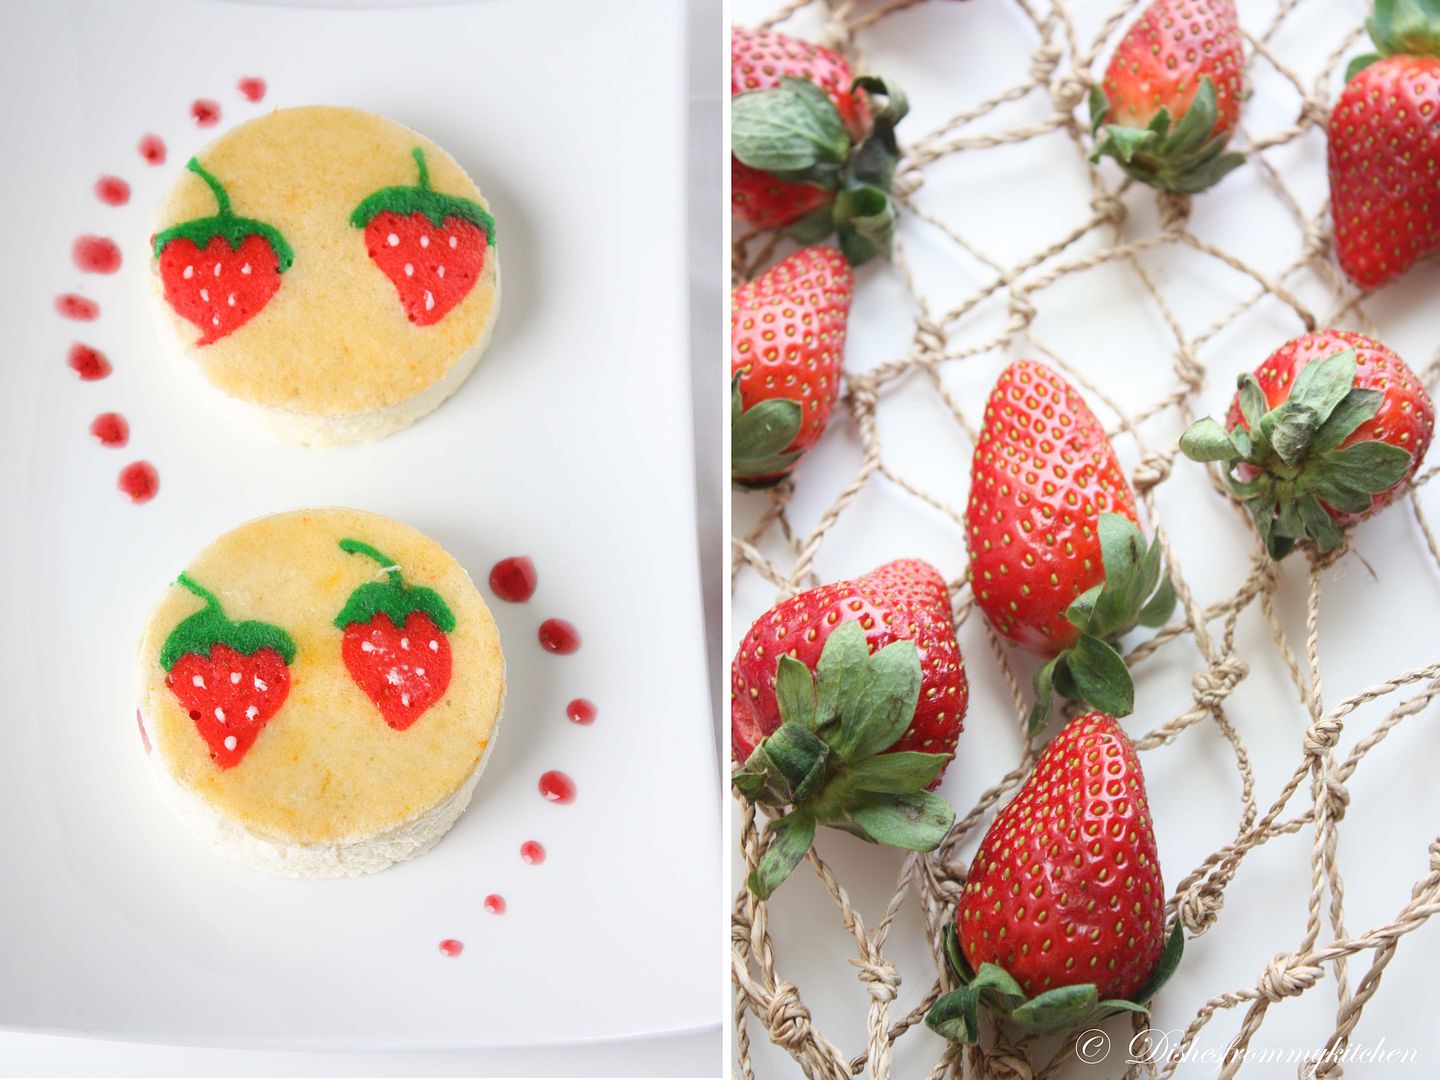
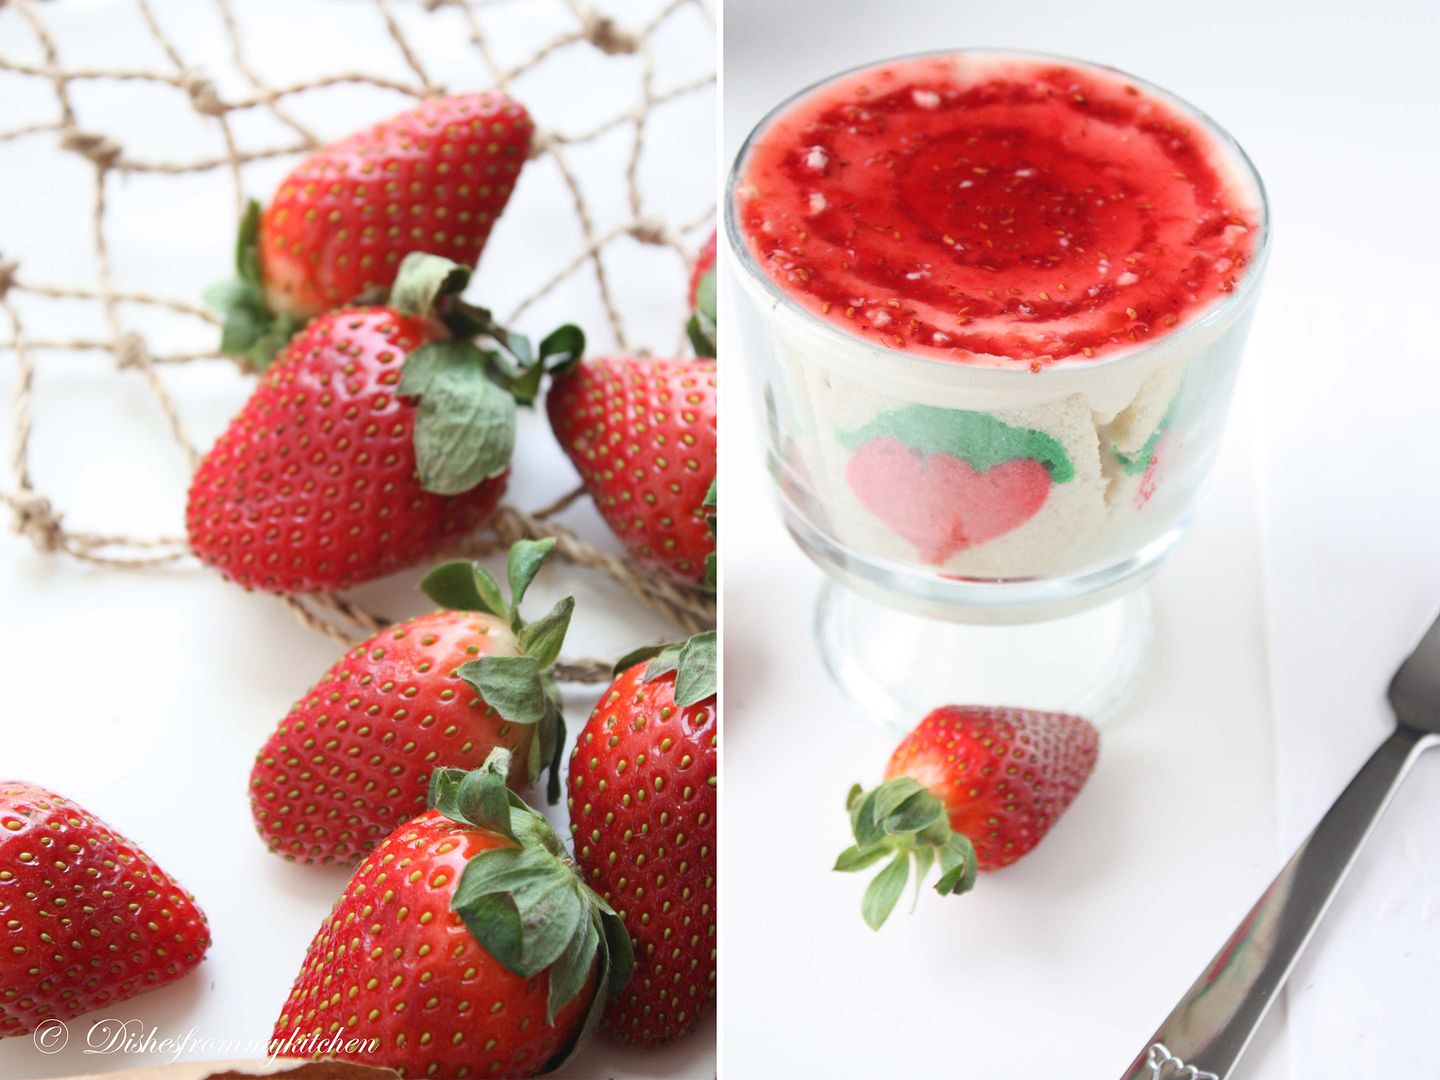
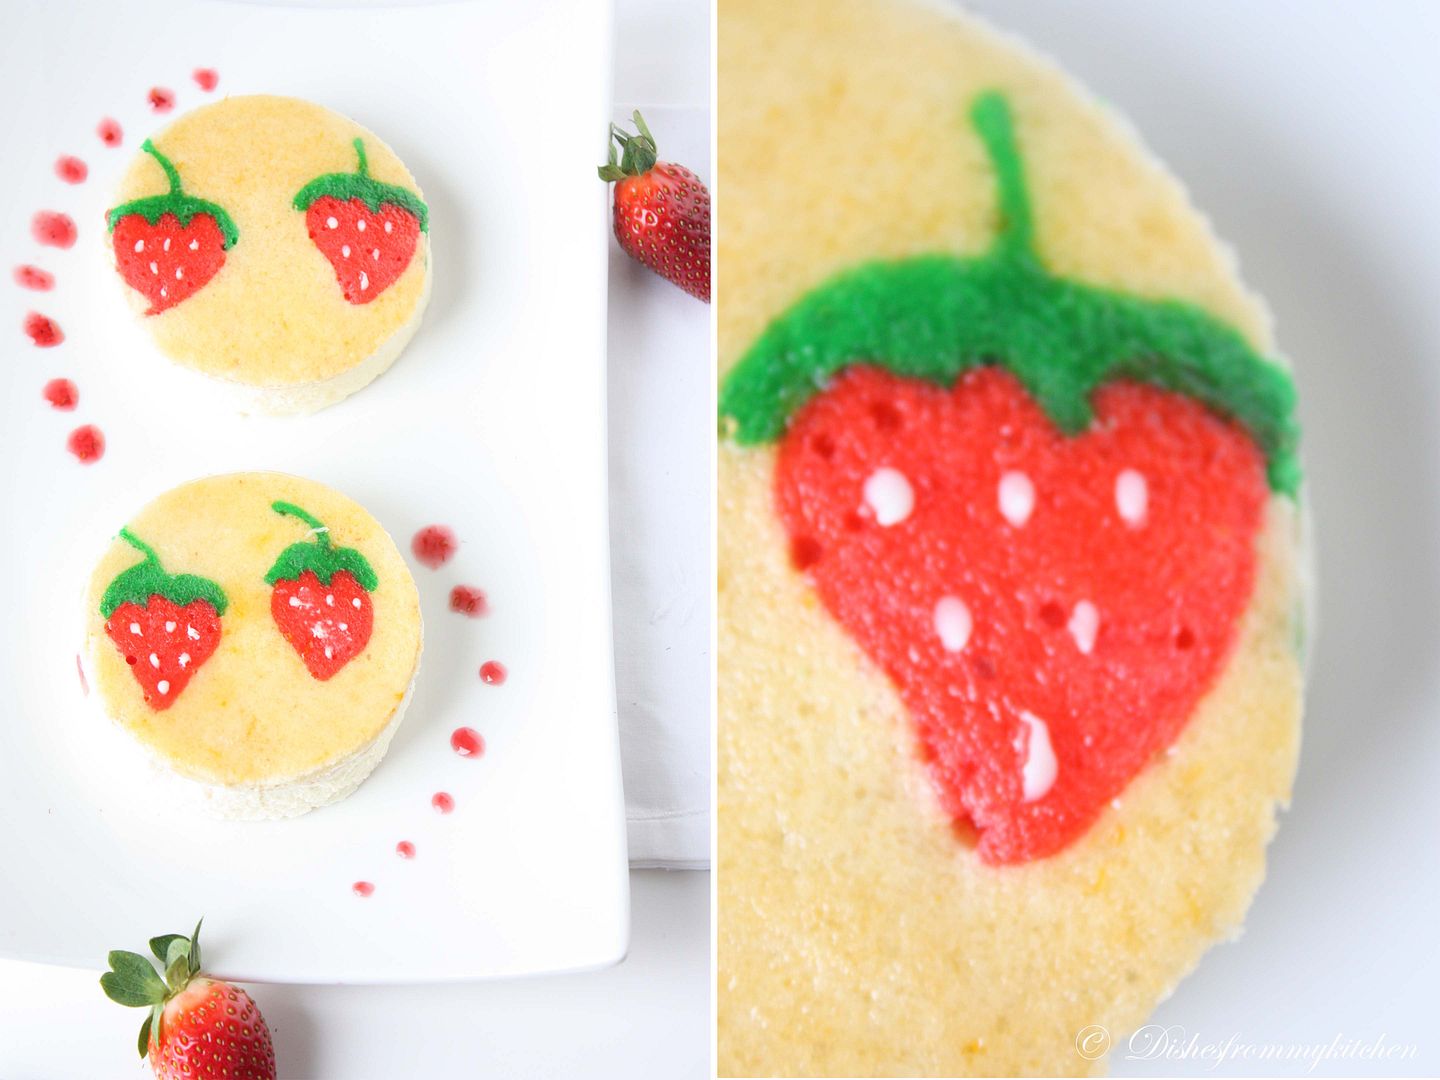
Very interesting and delicious challenge. I just wanted to keep very simple design and simple filling, as this month we are loaded with too many sweets. So I filled with strawberry Bavarian cream which is our favorite. Hope you all enjoy my Joconde Entremets.

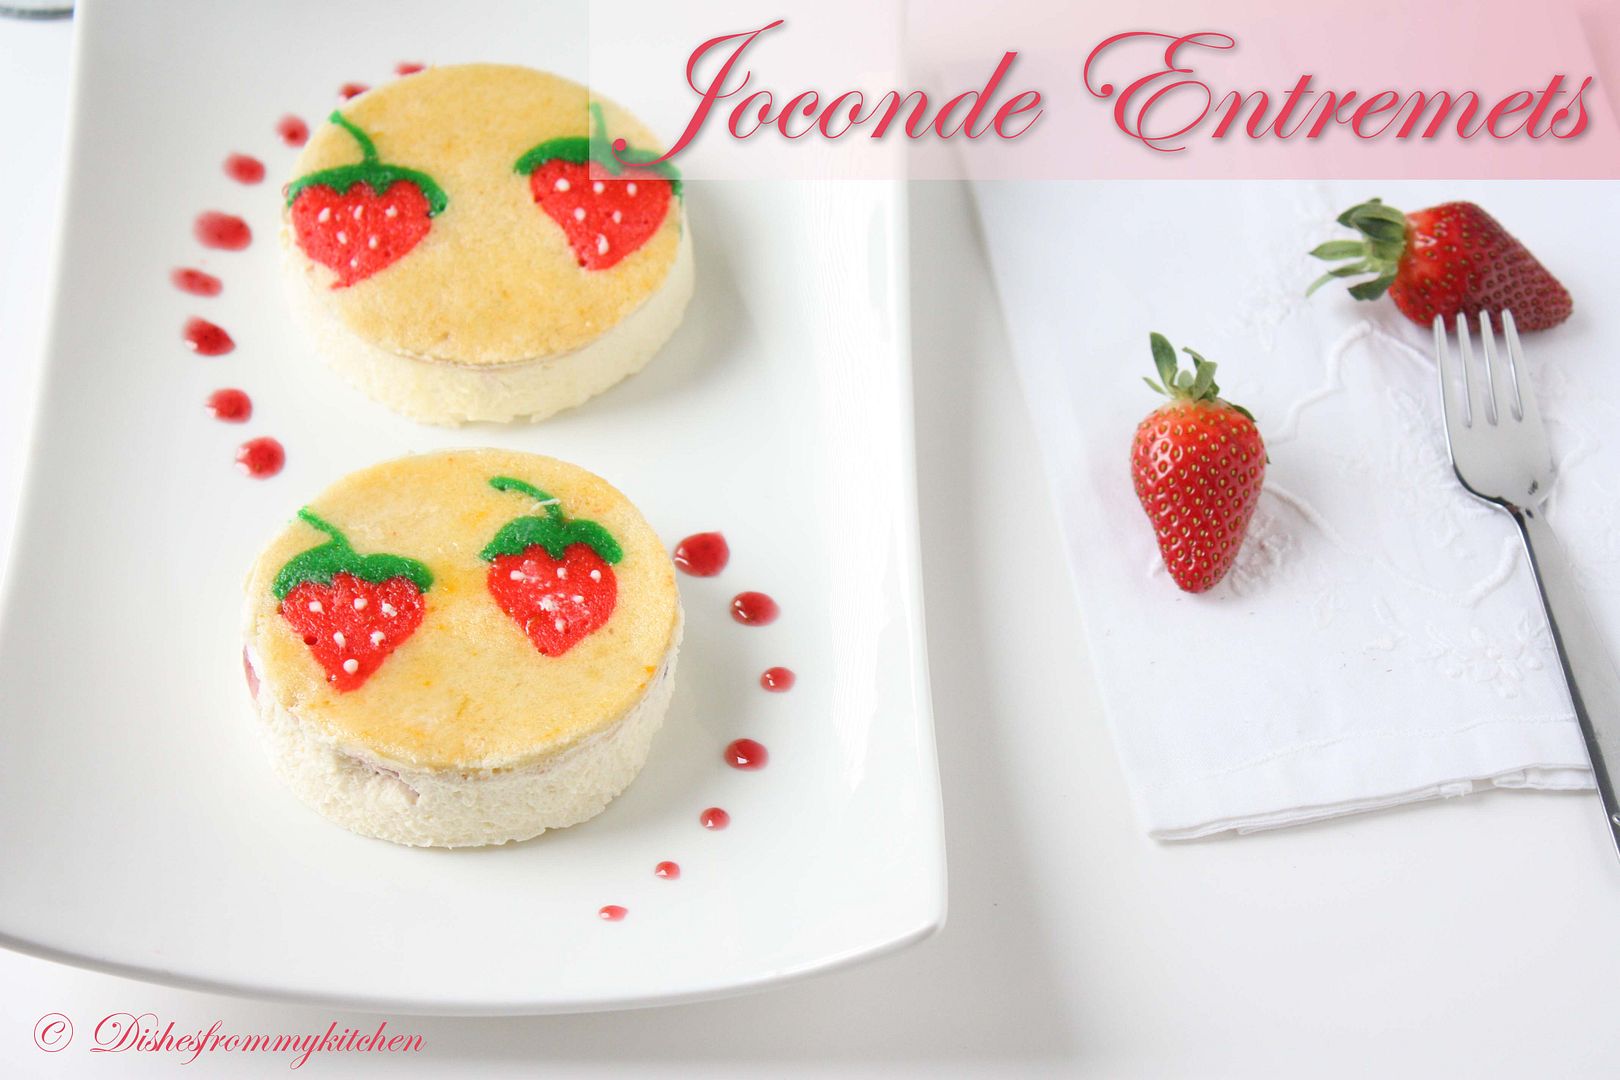
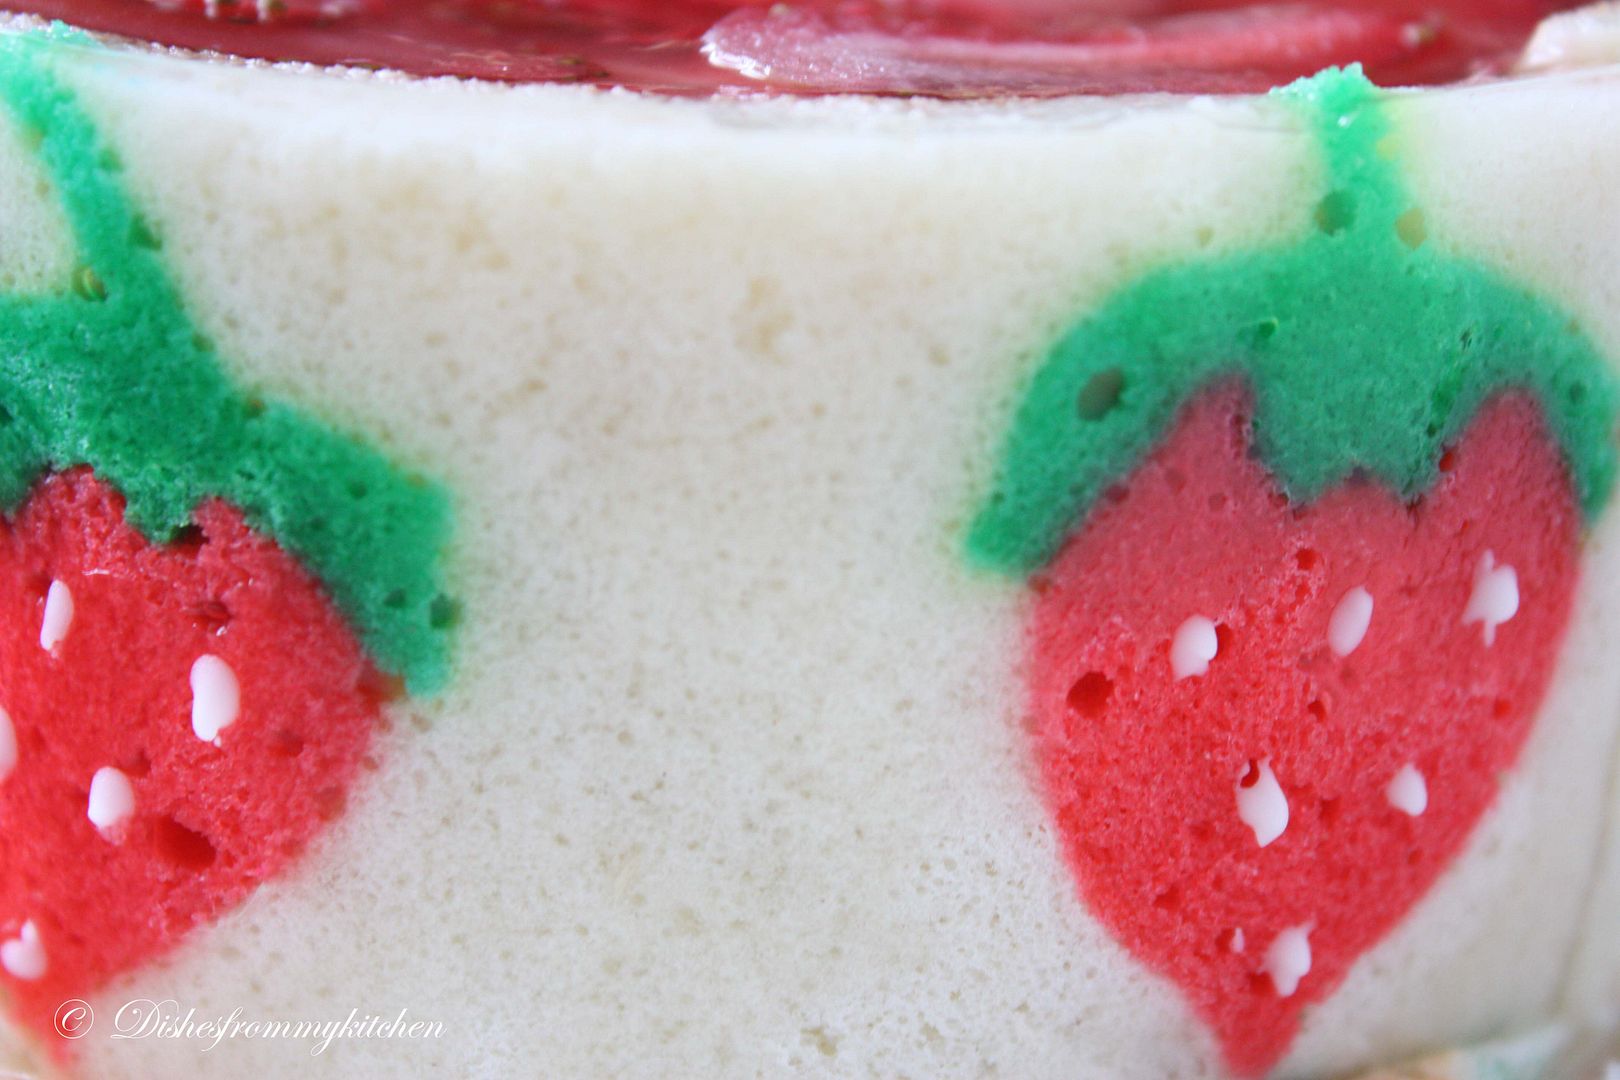
Ok...What is Joconde imprime/entremets ? - Joconde imprime /entremets. A joconde imprime (French Baking term) is a decorative design baked into a light sponge cake providing an elegant finish to desserts/torts/entremets/ formed in ring molds. A joconde batter is used because it bakes into a moist, flexible cake. The cake batter may be tinted or marbleized for a further decorative effect.
This Joconde/spongecake requires attentive baking so that it remains flexible to easily conform to the molds. If under baked it will stick to the baking mat. It over baked it will dry out and crack. Once cooled, the sponge may be cut into strips to line any shape ring mold.
Entremets (French baking term)- an ornate dessert with many different layers of cake and pastry creams in a mold, usually served cold. Think Trifle in a mold vs. a glass bowl.

Joconde Sponge
I just halved this recipe.
YIELD: Two ½ size sheet pans or a 13” x 18” (33 x 46 cm) jelly roll pan
Ingredients:
I just halved this recipe.
YIELD: Two ½ size sheet pans or a 13” x 18” (33 x 46 cm) jelly roll pan
Ingredients:
Almond flour/meal - ¾ cup *You can also use hazelnut flour, just omit the butter
Confectioners' (icing) sugar - ½ cup plus 2 tablespoons
Cake flour - ¼ cup
Eggs - 3 large
Egg whites - 3 large
White granulated sugar or superfine (caster) sugar - 2½ teaspoons
Unsalted butter, melted - 2 tablespoons
Directions:
1. In a clean mixing bowl whip the egg whites and white granulated sugar to firm, glossy peeks. Reserve in a separate clean bowl to use later.
2. Sift almond flour, confectioner’s sugar, cake flour. (This can be done into your dirty egg white bowl)
3. On medium speed, add the eggs a little at a time. Mix well after each addition. Mix until smooth and light. (If using a stand mixer use blade attachment. If hand held a whisk attachment is fine, or by hand. )
4. Fold in one third reserved whipped egg whites to almond mixture to lighten the batter. Fold in remaining whipped egg whites. Do not over mix.
5. Fold in melted butter.
6. Reserve batter to be used later.
Patterned Joconde-Décor Paste
I just quatered this recipe and made 2 different colors green and Red.
YIELD: Two ½ size sheet pans or a 13” x 18” (33 x 46 cm) jelly roll pan
Ingredients :
Unsalted butter, softened - 4 tablespoons
Confectioners' (icing) sugar - 1½ cups
Egg whites - 7 large
Cake flour - 1¾ cup
Food coloring gel, paste or liquid
COCOA Décor Paste Variation: Reduce cake flour to 6 oz / 170g. Add 2 oz/ 60 g cocoa powder. Sift the flour and cocoa powder together before adding to creamed mixture.
Directions:
1. Cream butter and sugar until light and fluffy (use stand mixer with blade, hand held mixer, or by hand)
2. Gradually add egg whites. Beat continuously.
3. Fold in sifted flour.
4. Tint batter with coloring to desired color, if not making cocoa variation.

1. Cream butter and sugar until light and fluffy (use stand mixer with blade, hand held mixer, or by hand)
2. Gradually add egg whites. Beat continuously.
3. Fold in sifted flour.
4. Tint batter with coloring to desired color, if not making cocoa variation.
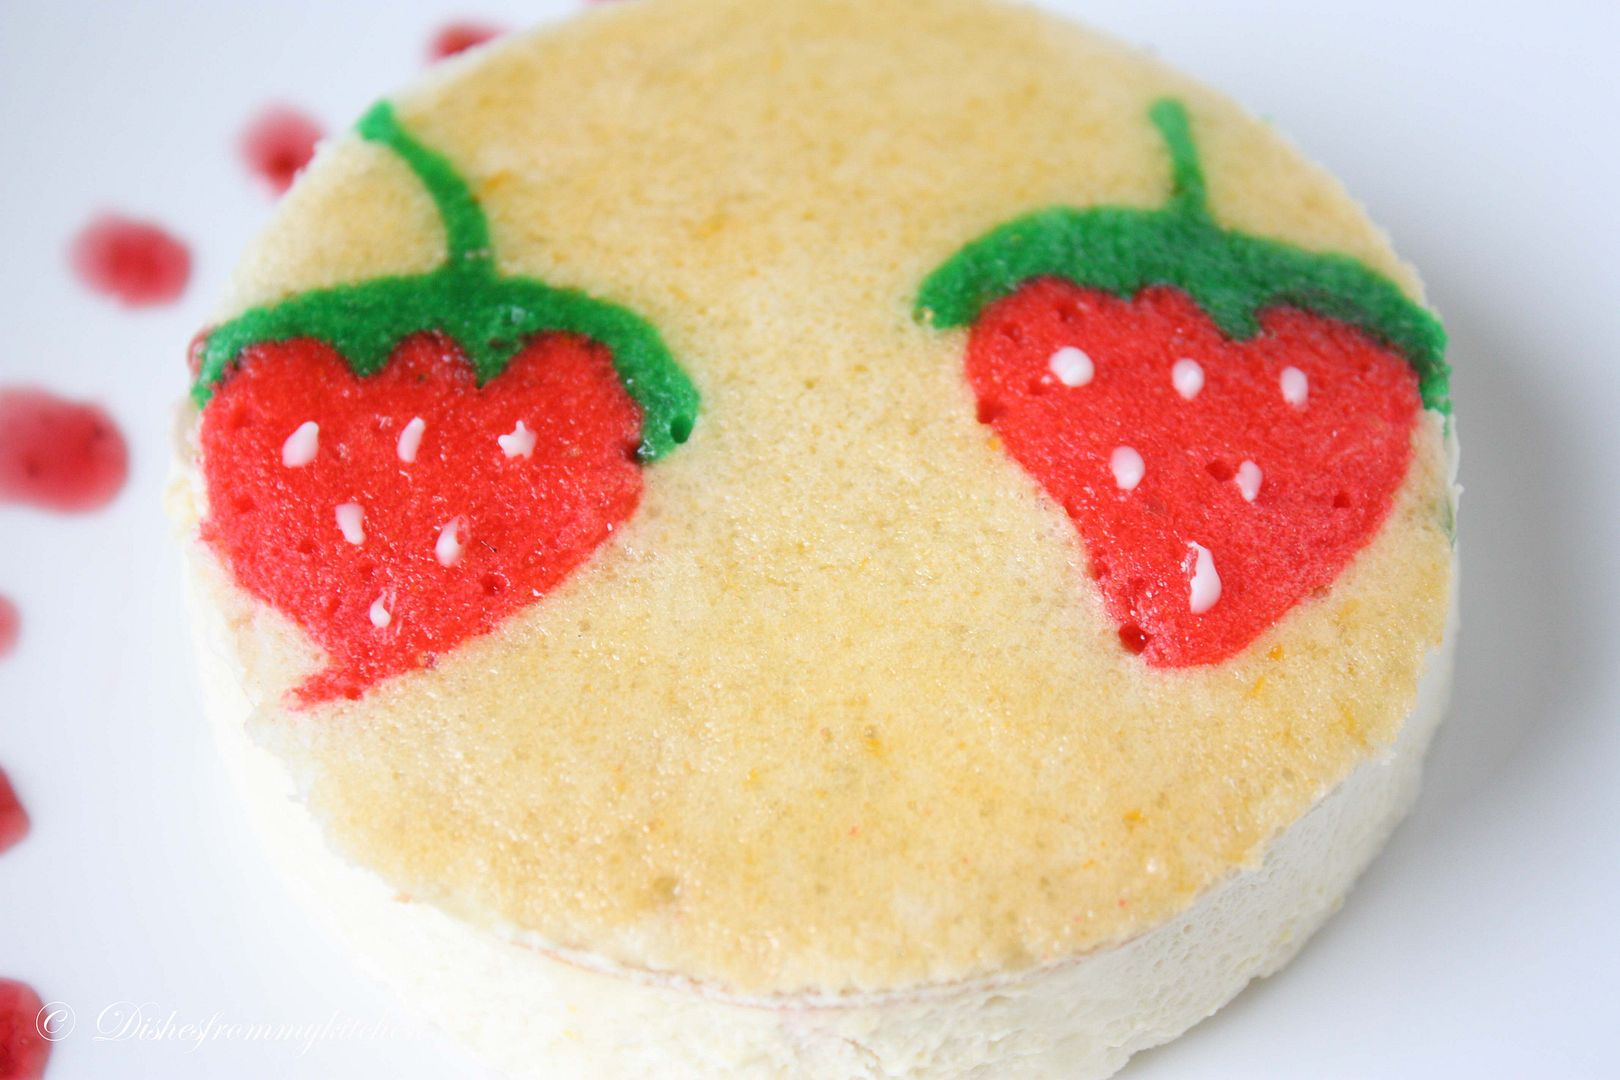
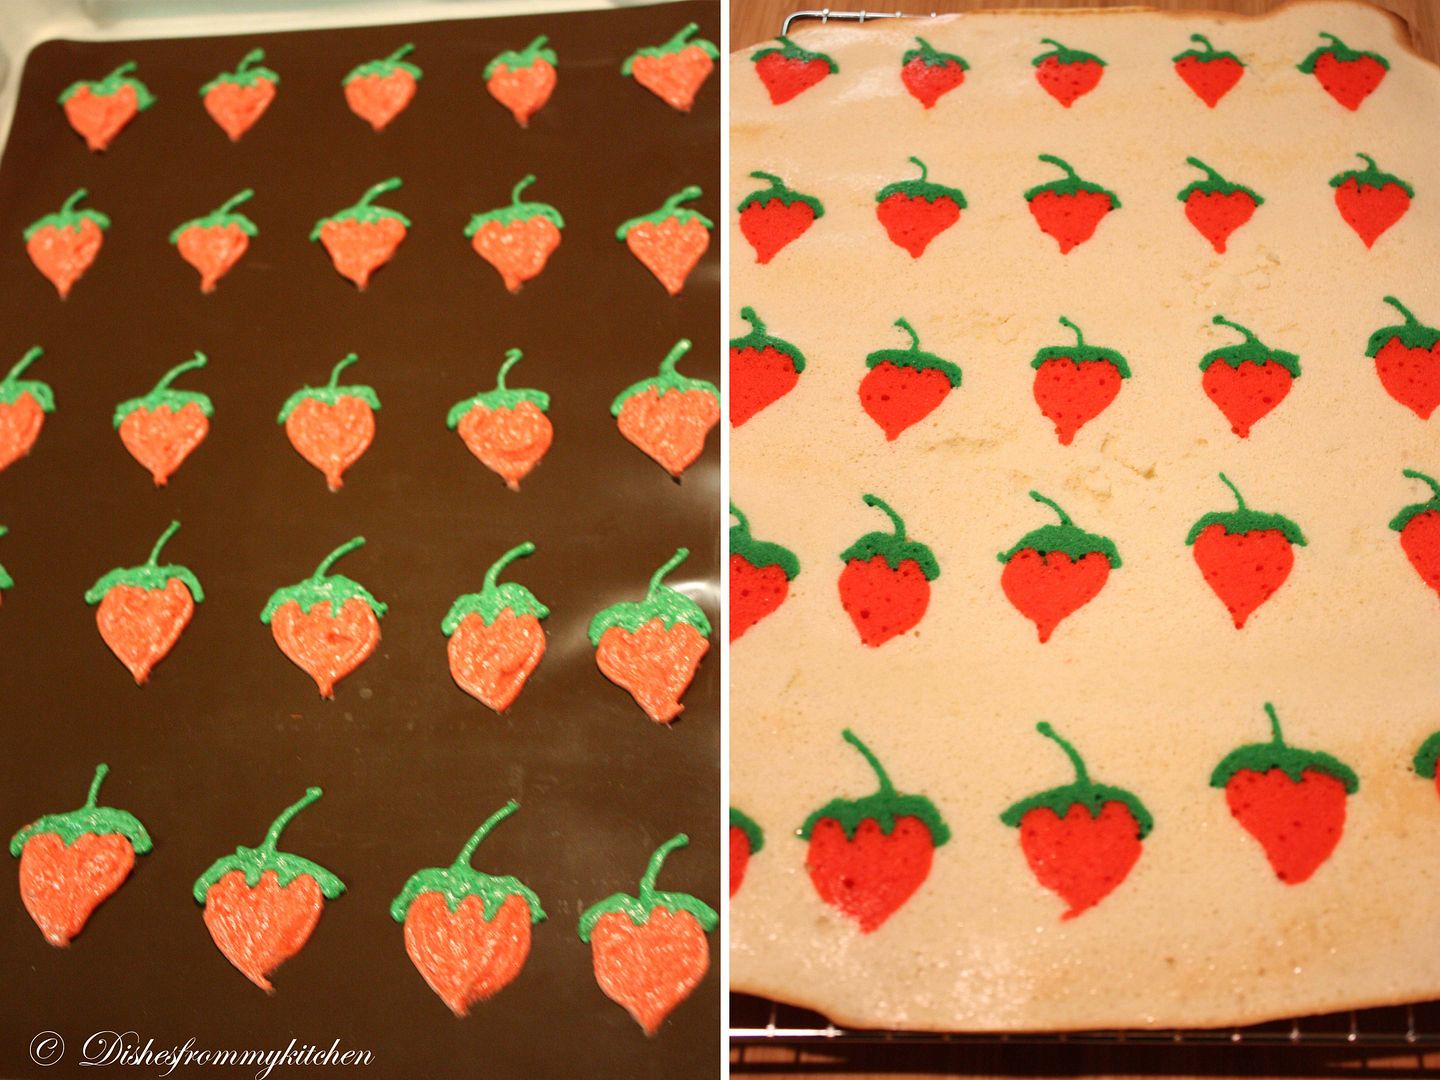
Preparing the Joconde- How to make the pattern:
1. Spread a thin even layer of décor paste approximately 1/4 inch (5 millimeter) thick onto silicone baking mat with a spatula, or flat knife. Place mat on an upside down baking sheet. The upside down sheet makes spreading easier with no lip from the pan.
2. Pattern the décor paste – Here is where you can be creative. Make horizontal /vertical lines (you can use a knife, spatula, cake/pastry comb). Squiggles with your fingers, zig zags, wood grains. Be creative whatever you have at home to make a design can be used. OR use a piping bag. Pipe letters, or polka dots, or a piped design. If you do not have a piping bag. Fill a ziplock bag and snip off corner for a homemade version of one.
3. Slide the baking sheet with paste into the freezer. Freeze hard. Approx 15 minutes.
4. Remove from freezer. Quickly pour the Joconde batter over the design. Spread evenly to completely cover the pattern of the Décor paste.
5. Bake at 475ºF /250ºC until the joconde bounces back when slightly pressed, approx. 15 minutes. You can bake it as is on the upside down pan. Yes, it is a very quick bake, so watch carefully.
6. Cool. Do not leave too long, or you will have difficulty removing it from mat.
7. Flip cooled cake on to a powdered sugared parchment paper. Remove silpat. Cake should be right side up, and pattern showing! (The powdered sugar helps the cake from sticking when cutting.)
Preparing the MOLD for entremets:
You can use any type of mold.
1. Start with a large piece of parchment paper laid on a very flat baking sheet. Then a large piece of cling wrap over the parchment paper. Place a spring form pan ring, with the base removed, over the cling wrap and pull the cling wrap tightly up on the outside of the mold. Line the inside of the ring with a curled piece of parchment paper overlapping top edge by ½ inch. CUT the parchment paper to the TOP OF THE MOLD. It will be easier to smooth the top of the cake.
2. A biscuit cutter/ cookie cutter- using cling wrap pulled tightly as the base and the cling covering the outside of the mold, placed on a parchment lined very flat baking sheet. Line the inside with a curled piece of parchment paper overlapping.
3. Cut PVC pipe from your local hardware store. Very cheap! These can be cut into any height you wish to make a mold. 2 to 3 inches is good. My store will cut them for me, ask an employee at your store. You can get several for matching individual desserts. Cling wrap and parchment line, as outlined above.
4. Glass Trifle bowl. You will not have a free standing dessert, but you will have a nice pattern to see your joconde for this layered dessert.

Preparing the Jaconde for Molding:
1. Trim the cake of any dark crispy edges. You should have a nice rectangle shape.
2. Decide how thick you want your “Joconde wrapper”. Traditionally, it is ½ the height of your mold. This is done so more layers of the plated dessert can be shown. However, you can make it the full height.
3. Once your height is measured, then you can cut the cake into equal strips, of height and length. (Use a very sharp paring knife and ruler.)
4. Make sure your strips are cut cleanly and ends are cut perfectly straight. Press the cake strips inside of the mold, decorative side facing out. Once wrapped inside the mold, overlap your ends slightly. You want your Joconde to fit very tightly pressed up to the sides of the mold. Then gently push and press the ends to meet together to make a seamless cake. The cake is very flexible so you can push it into place. You can use more than one piece to “wrap “your mold, if one cut piece is not long enough.
5. The mold is done, and ready to fill.
*Note: If not ready to use. Lay cake kept whole or already cut into strips, on a flat surface, wrap in parchment and several layers of cling wrap and freeze.
Entremet- Filling Options:
It is nice to have a completed dessert so you can unmold and see the Joconde working. Fill with anything you desire. Layers of different flavors and textures! However, it needs to be something cold that will not fall apart when unmolded.
Suggestions For Filling :
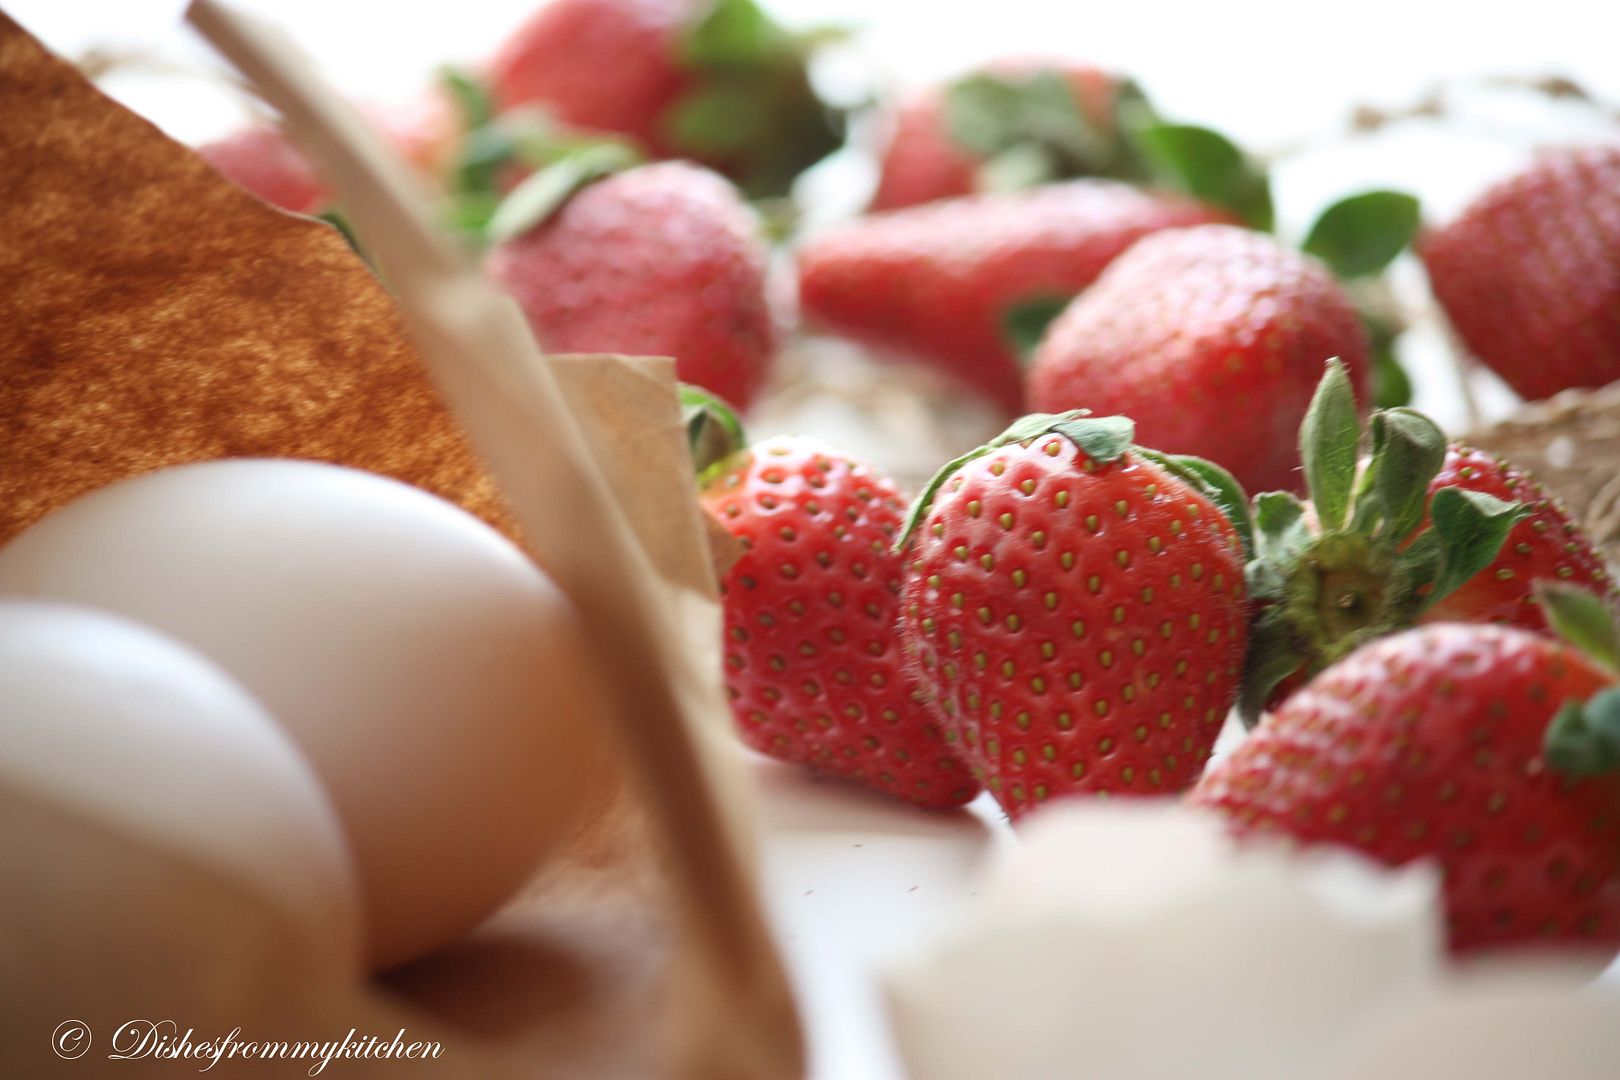
Mousses, pastry creams, Bavarian creams, cheesecakes, puddings, curds, jams, cookie bases, more cake (bake off the remaining sponge and cut to layer inside), nuts, Dacquoise, fresh fruit, chocolates, gelee.


Lots of hardwork put in, lovely creation...I should say u are absolutely patient n creative Pavi
ReplyDeleteHow do you have so much time and patience? superb and creative. All the best.
ReplyDeleteBeautiful desserts, gorgeous photos, oooh, I can almost smell strawberries just reading this! xxx
ReplyDeleteGosh....that strawberry pattern looks outstanding dear...would definitely love to eat this..hope u make this for me if I visit u..;)
ReplyDeletereally lot of effort...
that is just awesome... mind blowing... those patterns looks adorable.... wish u could send me some.. i clearly dont have that much patience.. kudos to u :)
ReplyDeletewow looks so yummy and loved ur click amazinggg
ReplyDeletewow!!Pavi hats off to u my dear...very simple and adorable...my daughter will definitely fell in love with those quite strawberries:)
ReplyDeleteWow,looks so pretty! Great effort and the outcome is really fantastic Pavi!
ReplyDeleteWow ...looks so beautiful ...lot for work but its paid off ....fab
ReplyDeleteI just LOVE your final entremet the pattern design of strawberries is so cute and elegant and the filling is such a winner.
ReplyDeleteWonderful work on this challenge.
Cheers from Audax from Sydney Australia.
Amazing snaps. The strawberry pattern is so cute..
ReplyDeletesimply WOW!!!
ReplyDeleteIm in love with your design they look absloutley super beautiful.
ReplyDeleteAbsolutely stunning Pavithra...Love yr strawberry work..
ReplyDeleteOMG..I take a bow!!
ReplyDeleteOmg, PAvi u rock dear, beautiful patterns and delicious joconde, cant take my eyes from the clicks..
ReplyDeleteBeatiful :)...Just one word EXCELLENT the way u have dont it !!!
ReplyDeleteLooks gorgeous Pavi, your strawberries in the biscuit jonde looks very cute. I made some last minute messy work, will post it later :)
ReplyDeleteI love your entremets and all the variations you created! The design is so cute and your sponge is so white! Job very well done! Congratulations!
ReplyDeletei really appreciate ur great effort and it came out so well without disppointing u. Awesome pictures and great going pavi
ReplyDeleteLove the strawberry pattern. Filling and the texture of is just the right. Gorgeous looking clicks!
ReplyDeletejust love it... awesome job...
ReplyDeleteLovely colours, lovely presentation...everything looks lovely here! Good job dear..;)
ReplyDeleteSlurp soo tempting and drool-worthy dish..
ReplyDeletewow, this is awesome..how i wish i could eat it..looks superb..
ReplyDeleteI love this! Your design is beautiful, and your filling sounds so perfect! Your hard work is amazing and inspiring. Thank you so much for sharing your creativity!
ReplyDeleteGorgeous cake dear,just love it, can't take my eyes off from the pictures :)
ReplyDeleteStrawberry design is a perfect match for the filling u choose...final product is simply WOW..ofcourse excellent pics :)
ReplyDeleteExcellent work never seen this type of presentation fabulous loved it so much...........
ReplyDeleteStrawberry bavarian cream sounds AMAZING, and your finished dessert is absolutely beautiful - the strawberries are both cute and fancy at the same time! Really awesome job. Oh, and your photographs are beautiful, also!!
ReplyDeleteexcellent job, wonderful pictures, i dont have any words to express
ReplyDeleteWell done with the challenge P...love the patterned joconde. Came out beautifully. I did a Strawberry Bavarian Mousse for mine, and an Espresso Panna Cotta for the other.
ReplyDeleteSuperb..dish n pics
ReplyDeleteReva
OMG...No words Pavi, awesome superb....
ReplyDeleteOMG !! looks gorgeous..Excellent job!!
ReplyDeletethats one gorgeous looking cake....soo pretty must have tasted great!...shows all the hard work u put in!
ReplyDeleteCheck out new event and giveaway at my blog:
http://smithasspicyflavors.blogspot.com/
Pavithra - I'm standing up and saluting you! You are an epitome of patience. Love this post and the pictures - this indeed is a tough one and you came out with absolutely brilliant strawberry colors! Congrats!
ReplyDeleteAbsolutely beautiful! Everything about this post bright and cheery, and the strawberry design is so perfect and so eye-catching. Wonderful stuff. :)
ReplyDeleteOMG great work, done very beautifully as always Pavithra and looks luscious!
ReplyDeletelooks superb...
ReplyDeleteWOW! What a sponge! You have created a masterpiece.
ReplyDeleteDeepa
Hamaree Rasoi
You Scored high!! looks fabulous..
ReplyDeleteammaandbaby.blogspot.com/
Lovely strawberries :) The pattern is nice :) looks like a lot of complication and well accomplished one :)
ReplyDeleteBeautiful, you did wonderful challenge.
ReplyDeleteAbsolutely gorgeous cake looks superb.
ReplyDeleteYou really are an artist Pavithra! Its difficult to decide which is better the cake or the photos :-)
ReplyDeleteAMAZING!!!! I remember seeing this in the forums and being bowled over. Just so pretty and clever. Beautifully plated, too.
ReplyDeleteAbsolutely gorgeous, divine, amazing, and awesome post!!!
ReplyDeleteYour cakes are so cute and look delicious!
ReplyDeleteAwesome... and absolutely beautiful... great artwork...
ReplyDeleteKrithi's Kitchen
Oh my gosh!!! You are phenomenal! I cannot believe you piped out strawberries!!! Simply perfect! I bet it was a real show stopper!! Beautiful, beautiful job!
ReplyDeleteWow looks yummy and beautiful cake..Just amazing dear.
ReplyDeleteLuks gr8!i know it's not at all easy work...Love the designs!
ReplyDeleteI've learnt something new. Thank you!
ReplyDeleteyour strawberries look just like mine....but prettier!!! hahaha :) Great job, so cute
ReplyDeleteI love the design you used. Cute strawberries! Excellent job!
ReplyDeleteYour strawberries look great, especially for being small and detailed! And I love the look of the strawberries on the top of the dessert. Nice job on the challenge!
ReplyDeleteThis is simply stunning Pavithra! You guys are really daring bakers! You have done a fabulous job!
ReplyDeleteD-R-O-O-L, Oh my, if only I can get it from my monitor and eat it, I'll absolutely get one! I bet it taste heavenly, plus the cute presentation makes it even more yummy!
ReplyDeleteOMG SPEECHLESS NO WORDS TO DESCRIBE.
ReplyDeleteFANTASTIC GORGEOUS,SUPERB!!!!!!!
Real treat to eyes, fabulous and beautifully done..
ReplyDeleteUS Masala
Quite impressive and pretty. Really appreciate your patience and great work.Awesome ,Pavi
ReplyDeleteUnbelievably gorgeous!! I wish you were living somewhere near me to teach me how to bake at least a decent cake :( I so want to taste this :(
ReplyDeleteOh God.. the colours and the pictures are just tempting.. lovely cake..
ReplyDeleteomg...how did you do that! This has got to be the best joconde I have ever seen. The strawberry pattern is so pretty.
ReplyDeletep.s do you tint the batter before or after spread a thin even layer of décor paste approximately 1/4 inch (5 millimeter) thick onto silicone baking mat with a spatula?
ReplyDeleteI did something similar before, but without Joconde batter atop, so I wonder the picture(one coco, the other is plain) on top just layered with decor paste or already with Joconde batter? And if it's topped with Joconde batter, is it still necessary to spread a layer of décor paste first?
Thanks!
Angie
wow...
ReplyDeletegr8 job dear...
they look gorgeous dear :)
I love your strawberry design.
ReplyDeleteFantastic!
Oh, so very pretty! Your strawberry pattern is just lovely and I'm sure the entremet was delicious!
ReplyDeleteWow Wow Wow, I am out of words when I look at this professional picture as well as execution. This is Amazing! You Rock. The dish appears to be right in front of me, but I cannot eat it. Hats off to you.
ReplyDeleteWow Pavithra!!! Loved those perfect strawberry patterns... great work dear!!!
ReplyDeletebeautiful clicks! Looks delicious and mouth watering!
ReplyDeleteWonderful, it is really eye-pleasing. The strawberries look lovely.
ReplyDeleteWonderful!!Your pattern was so perfect, I just love it, great job.
ReplyDeleteInma (México)
Pavitra, that looks wickedly delicious! Please do check out my website - I have an event that is totally up your street -- Look forward to your participation... Cheers,
ReplyDeletePriya Mahadevan
YOur entremet is so pretty. Love those perfect strawberries on the white background. They look like the real deal.
ReplyDeleteWow gorgeous!!!
ReplyDeleteVery cute, the strawberries are lovely and I also adore the slices so neat and gelleed
ReplyDeleteWow, so pretty! I love those cute patterns. Nice choice of filling. Great job.
ReplyDeleteCheers,
Rosa
Pavitra, I didn't get your email. No worry...I saw this recipe was used by many other fellow bloggers, with the same description, but the results were all different.
ReplyDeleteits looking great with strawberries pattern with lovely colors. excellent job pavithra
ReplyDeletewow your blog is so informative and detailed! Gotta bookmark it!
ReplyDeleteYour cake is so beautiful,i like your imprime, u can draw very pretty strawberries :D ! And I like how u stacked the strawberries on top..they're just so pretty!
wow this is great!!!
ReplyDelete